Import icons into Android Studio
Both Android Studio and Google Play Developer Console require developers to include app icons. You have to first import app icons assets into your Android Studio project. When you submit your app on Google Play Developer Console, you need to upload a 152 x 152 pixel png file for the app icon on Google Play Store. You can use MakeAppIcon to generate the Android icons and follow the guide below to fulfil Google's graphic asset requirements.
Import by drag and drop to Android Studio
- Extract the icon zip file.
-
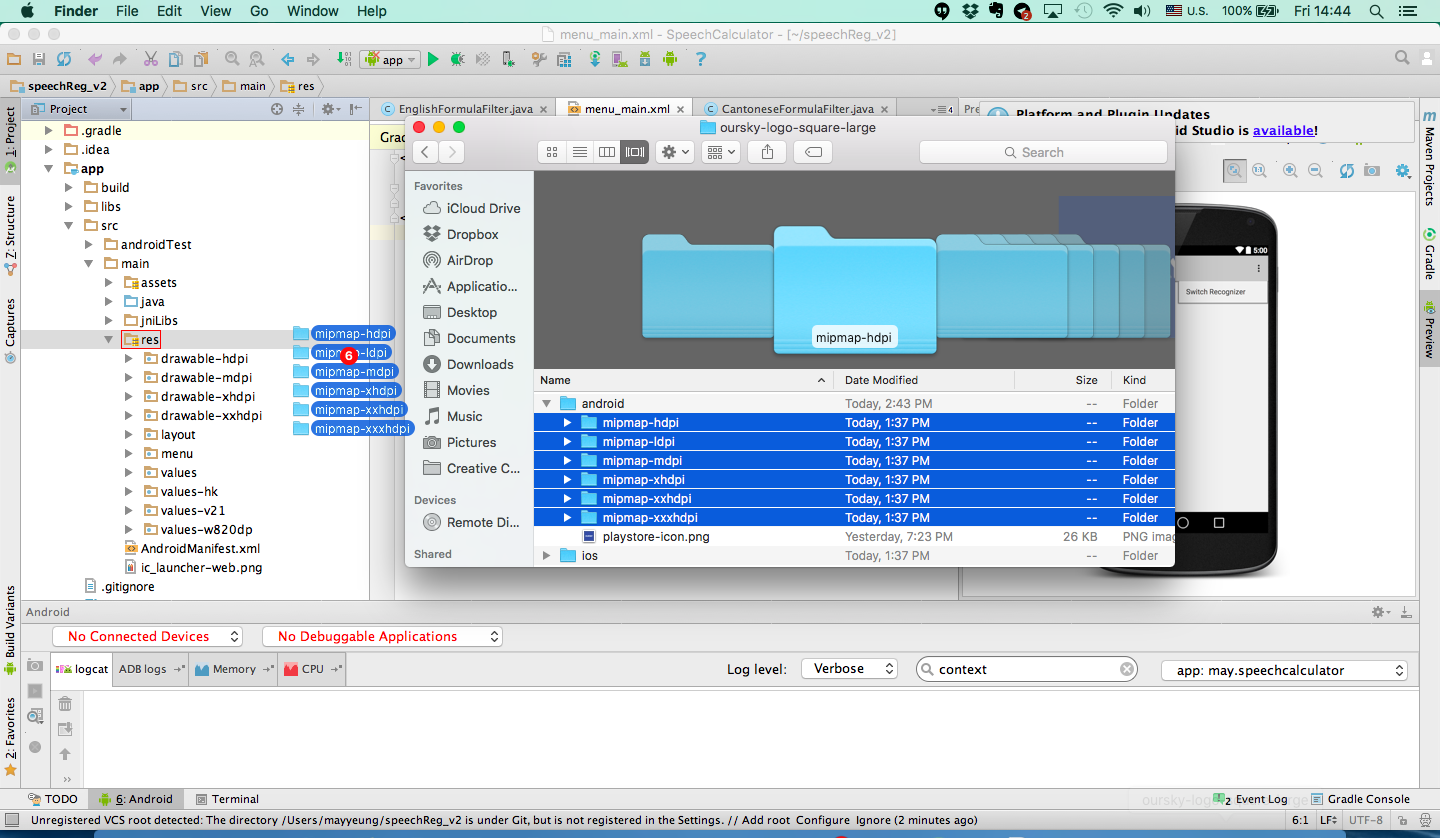
Find the
androiddirectory inside the extracted file. -
Now, go to Android Studio and open your project.

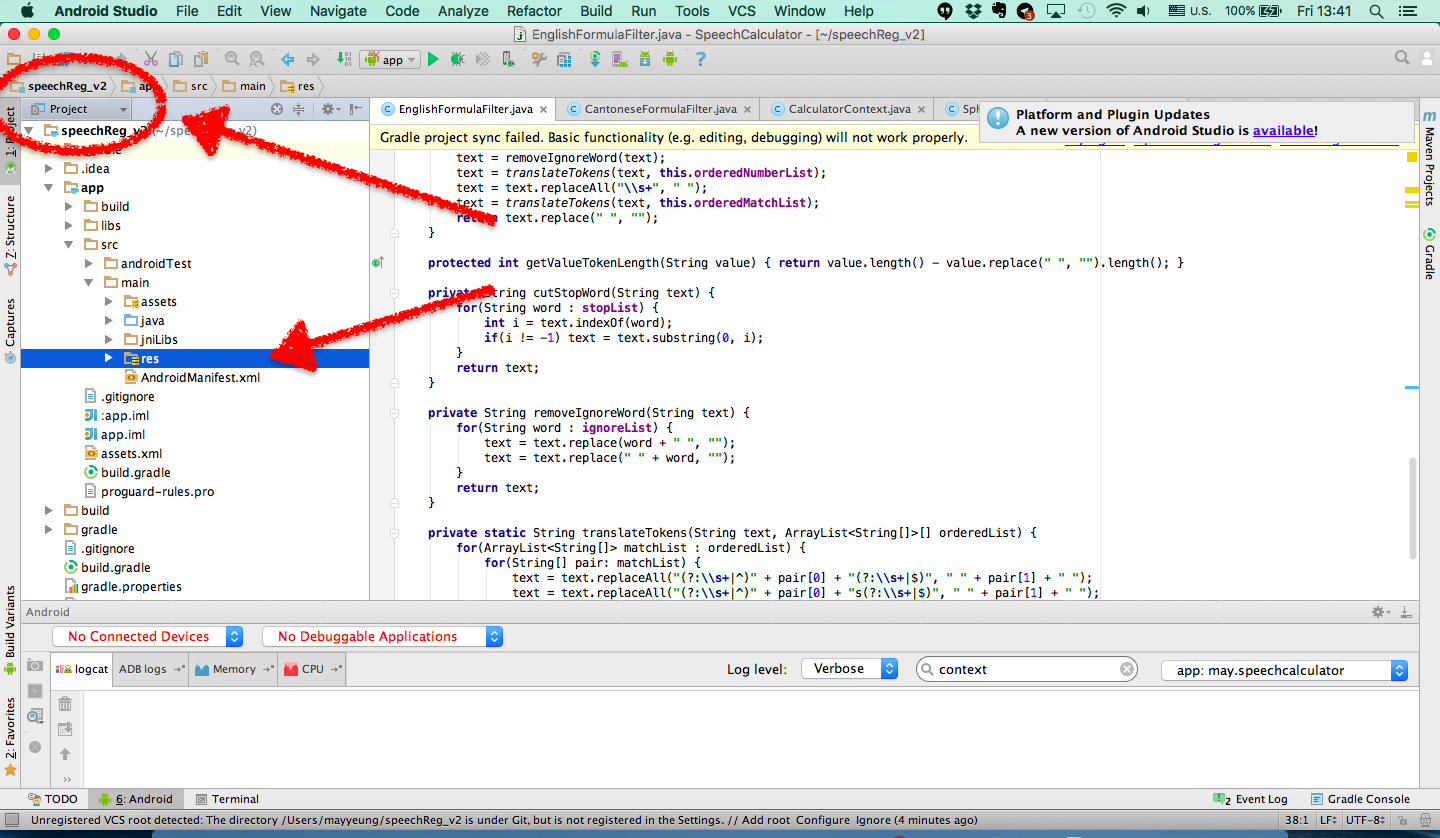
- Under Project (see the circle in the above photo), navigate to app >> src >> main >> res
-
Now drag and drop the all folders to res except 'playstore-icon.png'. If
you want to know more about the android icon size, please see
the Anrdoid Icon size list

-
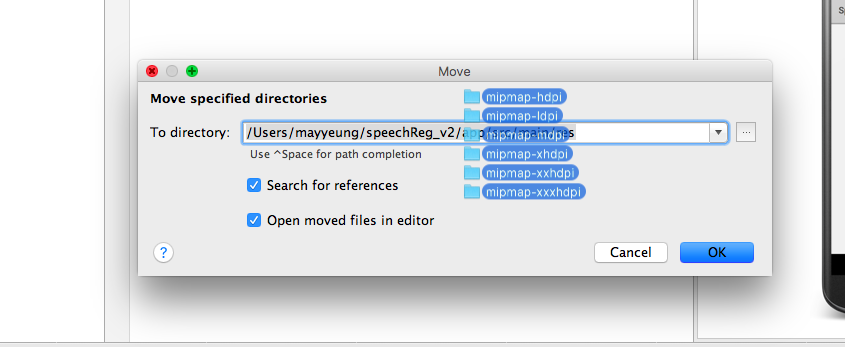
Then click 'OK' to move the Android icons to this directory.

-
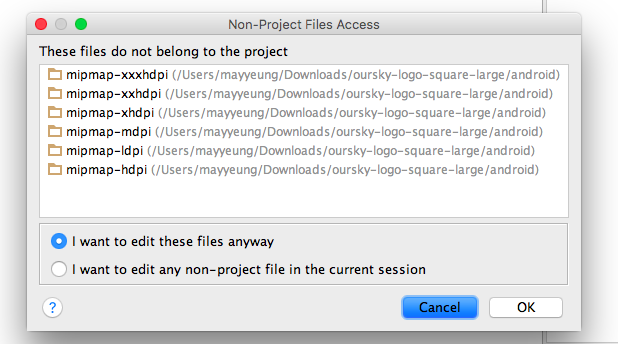
Last step, click 'OK' to confirm to add the files of android icons.

Submit your Play Store icon to Google Play Developer Console
Apart from importing your app icons on Android Studio, you have to submit another 152x152 px icon to Google Play developer console in order to display your app icon on Google Play. MakeAppIcon already has the Play Store icon ready for you. When you are ready to submit your app to Google, you can reference the step-by-step guide below.
- After logging into developer console, you should submit your APK file first.
- Then, click 'Store Listing' on the left-hand side.
- Scroll down to Graphic Asset.
-
Under 'Hi-res icon', submit the 152 x 152px 'playstore-icon.png' which
should be included in the extracted file under
androiddirectory generated by MakeAppIcon. - Fill in other information and submit your app!